Tiled floors in older houses, and even some newer ones, are one of the first things that come to mind when people consider doing a home renovation project. This is because they’re the parts of the house where most visible progress is made, and the fact that you can often install laminate over tile floor makes it a painless task in most cases.
If you have an old tile floor in your house or flat in the UK and are asking yourself “can you install laminate over tile?”, then you’re definitely not alone. Laminate flooring is becoming a more popular choice due to its appealing looks and affordability, and many people are interested in this simple solution to an otherwise daunting task. This guide will teach you all you need to know about installing laminate flooring over tiles.
Understanding the Basics: Is It Possible to Install Laminate Over Tile?
Yes, you can lay laminate flooring over tiles in most situations. This process is simple and cost-effective but requires some important steps to get right. Laminate floors can be installed over various subfloors including ceramic or porcelain tiles because they are multi-layered surfaces with a solid core board and wear layer for protection. The main thing is to prepare and assess the condition of your existing tiled floor properly before attempting an installation like this.
The installation process of laminate flooring over tiles is not too difficult and in some cases may even save time, money, and effort when compared to removing tiles and starting from scratch. Laminate is a great way to update any room, but before you go out and buy it, there are some things that you need to consider first: are your tiles in good condition? If not, they may need to be replaced before laying down laminate over them. When was the last time you had your tiles checked for water damage? If they’re more than 10 years old or show signs of wear and tear, consider replacing them first before laying down laminate over them as well.
Essential Prerequisites for Installing Laminate Over Tile
Before proceeding with your laminate installation project, you must ensure your tiled floor meets specific criteria. These requirements aren’t merely suggestions but fundamental necessities for achieving a durable, attractive result that will stand the test of time.
Critical Floor Conditions to Check:
- Level Surface: Your tile floor must be level within 3mm over a 3-metre span. Significant variations will cause laminate planks to rock, creating gaps and potentially voiding manufacturer warranties
- Structural Integrity: All tiles must be firmly attached to the subfloor with no loose, cracked, or broken pieces that could compromise the new flooring
- Clean and Dry: The surface should be completely free from moisture, grease, soap residue, and other contaminants
- Grout Condition: Grout lines should be filled and level with the tile surface, or only slightly recessed
- Height Considerations: Adding laminate with underlayment will raise your floor level by approximately 8-12mm, which may affect door clearances and transitions to adjacent rooms
Moisture and Structural Assessment:
- Conduct a moisture test using a moisture metre or plastic sheet taped to the floor for 24 hours
- Check for any signs of water damage, particularly in bathrooms and kitchens
- Ensure the subfloor beneath the tile is structurally sound without flexing or movement
- Verify that underfloor heating systems, if present, are compatible with laminate flooring
Preparing Your Tiled Floor for Laminate Installation
Proper preparation forms the foundation of a successful laminate installation over tile. Rushing through this stage often leads to disappointing results and premature flooring failure. Professional renovators emphasise that preparation typically accounts for approximately 60% of the project’s success.
Step-by-Step Preparation Process
Begin by thoroughly cleaning the entire tiled surface using a suitable degreasing solution. Remove all traces of soap, wax, or cleaning product residue that could interfere with underlayment adhesion or create instability. Once clean, inspect every tile meticulously, tapping each one with a wooden handle or similar tool to identify hollow sounds indicating loose tiles.
Any loose or damaged tiles require immediate attention. Remove broken tiles and fill the resulting gaps with self-levelling compound, ensuring the patched area sits flush with surrounding tiles. For slightly uneven grout lines, apply floor levelling compound across the entire surface, following manufacturer instructions carefully. This creates an ideally smooth substrate for your laminate installation.
Address any height discrepancies using appropriate levelling products. Self-levelling compounds work exceptionally well for minor variations, whilst more significant issues may require professional assessment. Remember that laminate flooring is remarkably unforgiving of uneven subfloors, so investing time in proper levelling prevents future problems.
Selecting the Right Materials and Underlayment
Choosing appropriate materials significantly impacts both the installation process and long-term performance of your laminate flooring. Not all laminate products suit installation over tile equally well, and underlayment selection proves particularly crucial.
Laminate Flooring Selection
Opt for laminate flooring specifically rated for your room’s purpose. Bathrooms and kitchens require water-resistant or waterproof laminate varieties, whilst living areas can accommodate standard options. Consider thickness carefully—thicker laminate (10-12mm) provides better sound insulation and feels more substantial underfoot, although it raises floor height more significantly.
Underlayment Options
Standard foam underlayment is appropriate for smooth, well prepared tile floors. Moisture barrier underlayment provides additional protection and is recommended where damp conditions are expected. Cork underlayment provides greater sound insulation and cushioning, at a higher cost. If the surface is slightly uneven, a thicker 3mm underlayment will help to smooth out small surface irregularities. Underlayment should never be skipped or eliminated, it provides important moisture, noise and surface stability control.
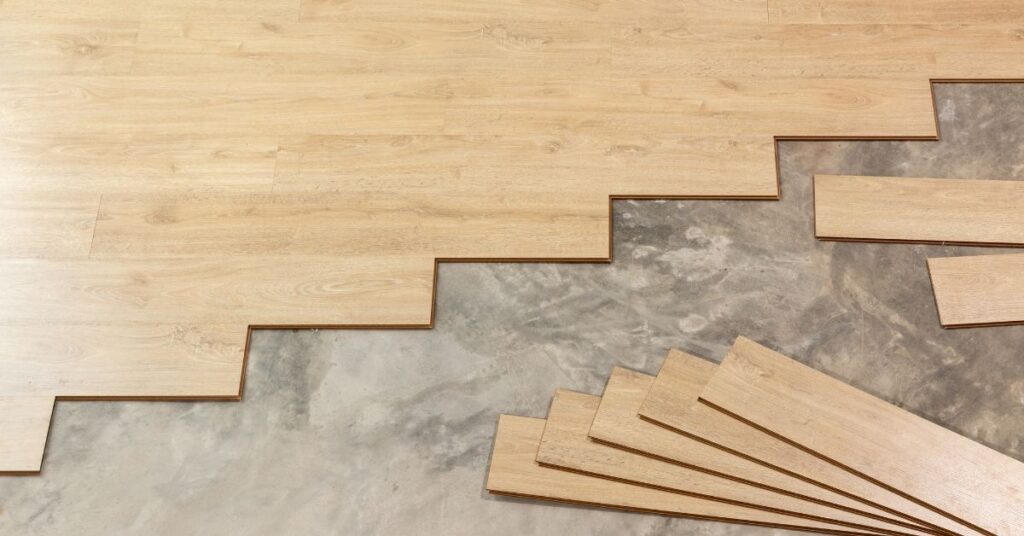
The Installation Process: Laying Laminate Over Tile
With preparation complete and materials selected, you’re ready to begin the actual installation. Whilst DIY installation is certainly possible for those with basic handyman skills, understanding the process helps whether you’re tackling the project yourself or overseeing professional contractors.
Installation Steps Overview:
- Acclimatisation: Allow laminate planks to acclimatise in the room for 48 hours before installation, maintaining room temperature between 18-24°C
- Underlayment Installation: Roll out underlayment perpendicular to your planned plank direction, taping seams with appropriate tape
- Starting Wall Selection: Begin along the straightest, longest wall in the room, typically opposite the main entrance
- Expansion Gaps: Maintain 10-12mm expansion gaps around all room perimeters using spacers
- Plank Installation: Follow the click-lock system instructions, staggering end joints by at least 300mm
- Doorway Transitions: Install appropriate transition strips where laminate meets other flooring types or room thresholds
Common Challenges and Practical Solutions
Even carefully planned laminate installations over tile can face practical issues. Identifying these challenges early helps prevent long term problems and highlights when professional support may be necessary.
Dealing with Significant Height Changes
- Installing laminate over tile increases floor height, especially noticeable at doorways and room transitions
- Standard transition strips typically manage height differences up to around 15mm
- Larger differences may require reducer mouldings or threshold strips
- Doors may need trimming to allow proper clearance above the new floor
- Always measure laminate and underlayment thickness and allow an additional 8 to 10mm clearance for smooth door operation
Managing Uneven Grout Lines
- Deep grout lines can remain problematic even after using levelling compound
- In severe cases, a thin plywood layer of 3 to 6mm can be installed over the tile
- Plywood creates a smooth and stable base while adding minimal height
- Sheets must be securely fixed, with seams filled and sanded for an even finish
Addressing Moisture Concerns
- Moisture is the most significant long term risk to laminate flooring
- Extra precautions are required in kitchens, bathrooms, and below ground spaces
- Apply waterproof sealant around room edges before installation
- Use properly fitted transition strips to prevent moisture movement from wet areas
How LB Group Helps Guide Your Flooring Project
So far, we’ve talked about the general things to consider when laying laminate over tile, but it can be helpful to hear from a pro. At LB Group, our main business is boilers and central heating systems, but for eight years we’ve been offering support for all aspects of home renovation, so we’ve seen more than our fair share of tile projects in London properties. We get that it’s not all about laying the floor. Our customers come to us because we understand the importance of the plumbing, heating, and electrical systems to any renovation.
If you are installing laminate over tile, our team is here to guide you in how they all fit together and help you choose a product that is right for your home. You need to consider whether your underfloor heating is compatible with a new laminate floor, as well as how to manage moisture if you are working in the bathroom. All this to say, we are here to help. LB Group is proud of our many five-star reviews from satisfied London customers because we truly care about making the right decisions for your home.
Advantages and Disadvantages of Installing Laminate Over Tile
Advantages
- Avoids tile removal, reducing labour, waste, and the risk of subfloor damage
- Lowers overall renovation costs by eliminating demolition expenses
- Speeds up installation, with many projects completed in a single day
- Minimises disruption, making it suitable for occupied homes
- Improves noise reduction, as tile combined with underlayment dampens sound effectively
- Performs well in upper floors and multi family properties
- Provides a stable and rigid base that supports long term laminate durability when properly prepared
Disadvantages
- Increases floor height by approximately 10 to 15mm, which may affect transitions and door clearances
- May require trimming doors and installing specialised transition strips
- Can feel restrictive in rooms with limited ceiling height
- Covers existing tiles permanently, limiting future access or design changes
- Prevents inspection or repair of underlying subfloor issues
- Not suitable for areas with moisture concerns or structurally compromised subfloors
Alternative Flooring Options Over Tile
Whilst this guide focuses on laminate, other flooring types can also be installed over tile, each with distinct characteristics worth considering. Luxury vinyl plank (LVP) flooring offers superior water resistance compared to laminate, making it particularly suitable for bathrooms and kitchens. LVP installs similarly to laminate but tolerates moisture exposure better.
Engineered wood flooring provides a more premium appearance than laminate but comes at considerably higher cost. It requires similar preparation to laminate but offers authentic wood character that some homeowners prefer. However, engineered wood proves less suitable for moisture-prone areas.
Carpet with appropriate padding can be installed over tile, though this option has largely fallen out of favour for main living areas. It works best in bedrooms where sound dampening and warmth prove most valuable. Cork flooring represents an eco-friendly option that installs over tile whilst providing excellent thermal and acoustic properties, though it requires more maintenance than laminate.
Making Your Decision
Deciding whether to install laminate over tile ultimately depends on your specific circumstances, budget, and priorities. This approach offers excellent value when your existing tiles provide a stable, level base but no longer suit your aesthetic preferences or functional needs. The time and cost savings compared to tile removal prove compelling for many homeowners, whilst the end result can be equally attractive and functional.
However, this isn’t a universal solution. Situations involving seriously uneven tiles, moisture problems, or valuable original tiles that might appreciate in value may warrant alternative approaches. Take time to honestly assess your floor’s condition, consider professional opinions when uncertain, and weigh both immediate and long-term implications.
With proper preparation, quality materials, and careful installation, laminate over tile creates beautiful, durable flooring that enhances your home’s comfort and value for decades to come. Whether you choose professional installation or tackle the project yourself, understanding these principles ensures informed decision-making and successful outcomes that you’ll enjoy for years ahead.
Frequently Asked Questions
Can you install laminate flooring directly over ceramic tile without underlayment?
No, underlayment remains essential even when installing over tile. It provides crucial moisture protection, sound dampening, and helps compensate for minor surface imperfections. Skipping underlayment will likely void manufacturer warranties and result in a harder, noisier floor with reduced longevity.
Will installing laminate over tile cause moisture problems?
When properly installed with appropriate moisture barriers, laminate over tile shouldn’t cause moisture issues. However, if the tile or subfloor beneath already has moisture problems, covering with laminate may trap moisture and worsen the situation. Always conduct moisture testing before installation, particularly in below-grade areas, bathrooms, and kitchens.
How do you handle underfloor heating when installing laminate over tile?
Underfloor heating compatibility requires careful consideration. Ensure your chosen laminate is specifically rated for use with underfloor heating systems look for products with appropriate thermal resistance ratings. The tile layer provides excellent heat conduction, but adding laminate and underlayment creates insulation that reduces heating efficiency.
What happens to the tile if I want to remove the laminate later?
The tiles beneath remain intact and undamaged when you remove laminate flooring, provided no adhesive was used during laminate installation. This represents a significant advantage of floating laminate floors, they can be removed relatively easily if you decide to change flooring again in future. Simply remove skirting boards, lift the laminate planks, and remove the underlayment to reveal the original tiles.
Can you install laminate over tile in a bathroom?
Yes, but with important caveats. Use only waterproof or highly water-resistant laminate specifically rated for bathroom use. Pay meticulous attention to moisture barriers, seal all perimeter gaps, and ensure proper ventilation in the bathroom. Consider that whilst possible, vinyl plank flooring often performs better in bathrooms due to superior moisture resistance.

Sunny Saini is a certified heating engineer with over 15 years of experience in maintaining and repairing boilers. He specializes in diagnosing complex boiler issues and providing reliable solutions to ensure homeowners stay warm and comfortable throughout the year.


![]=](https://localboiler.co.uk/wp-content/uploads/2024/05/Untitled-design-96-300x300.jpg)